Overview:
There are a few places in TripMaster where you can access the Demand Reservation Template of which we see below. 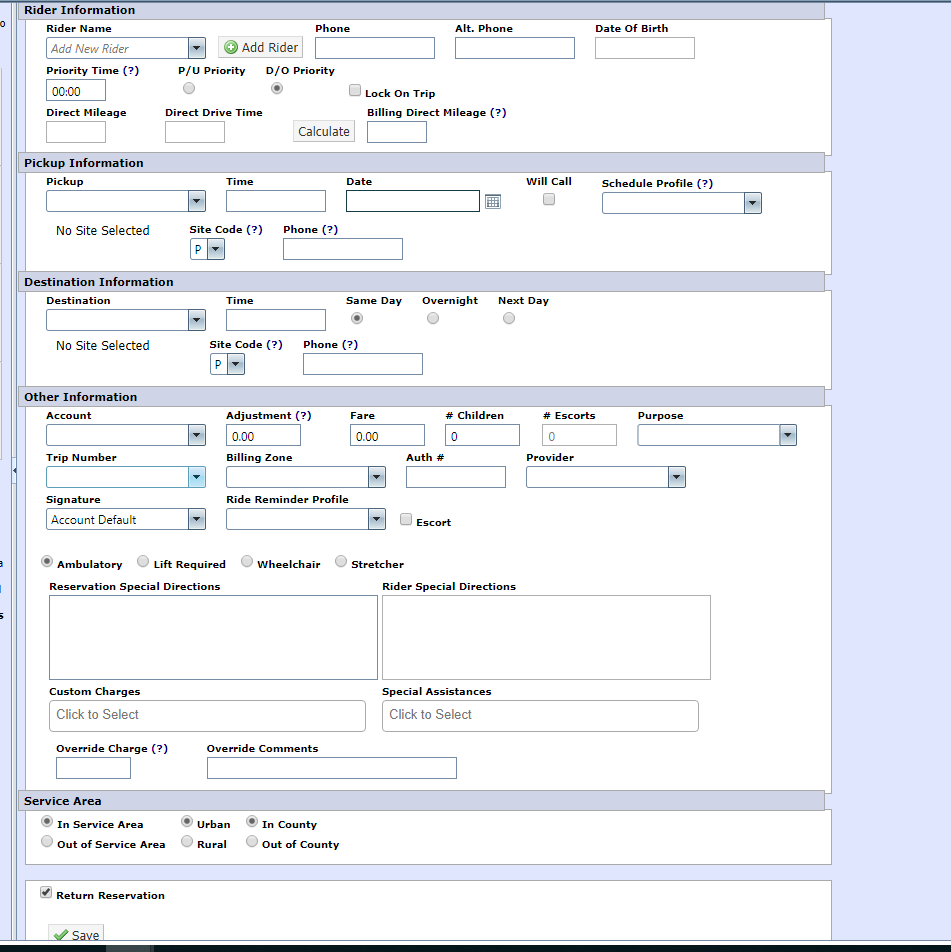
Section 1: Rider Master
One way to access this template to fill out a reservation is through your Master Pages using the Rider Master Page.
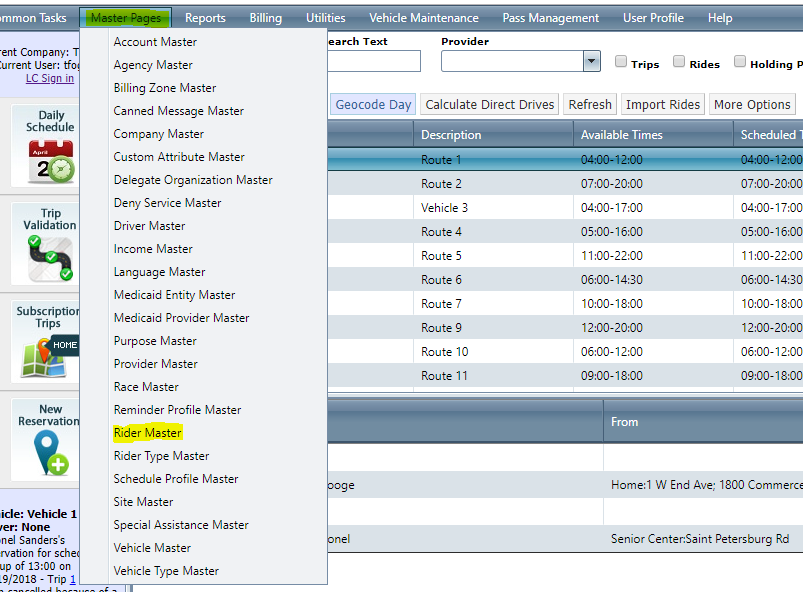
Once pulled up you can either search for an existing rider by first or last name or create a new rider if the rider is not already entered in the system.

Once you have found and selected your rider or created a new rider you will be brought to the rider summary screen.
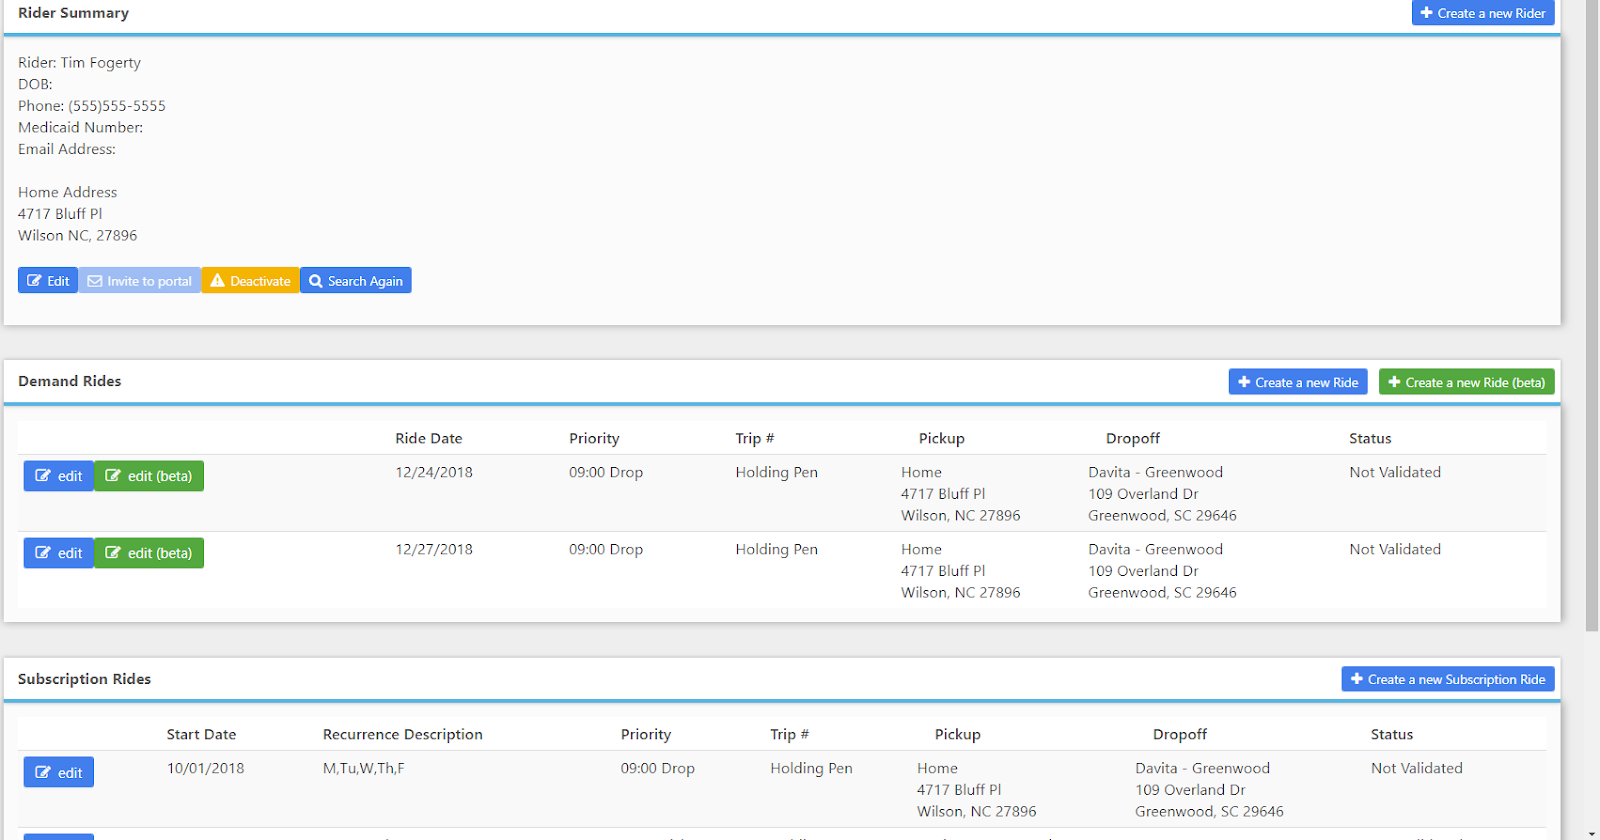
This screen shows you any current Demand Reservations already created for the rider for the past 30 days and 30 days into the future as well as any subscription(reoccurring) reservation that have been entered for the rider. To create a demand reservation, click on the “Create a new Ride” button under the demand rides section. This will open the demand reservation template for you to fill out.
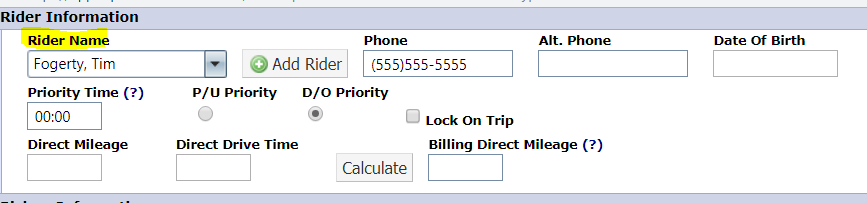
First choose your rider from the drop down Rider Name Menu (*Hint you can type the last name in the drop down box to jump to that rider instead of scrolling all the way through)

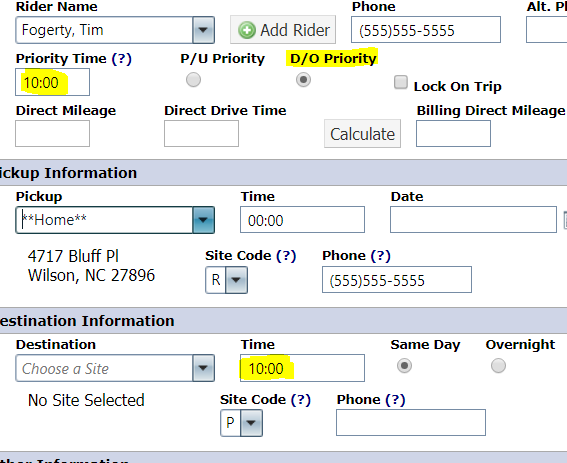
Next we need to enter the Priority Time. A D/O Priority is used for an A-Leg or in other words going from home to a location such as a doctor’s office or any other location. The priority time you enter will be the time of the Riders appointment time or the time they need to be at a location. After entering click anywhere in the white on the screen to populate that time down in the Drop Off Time section below.
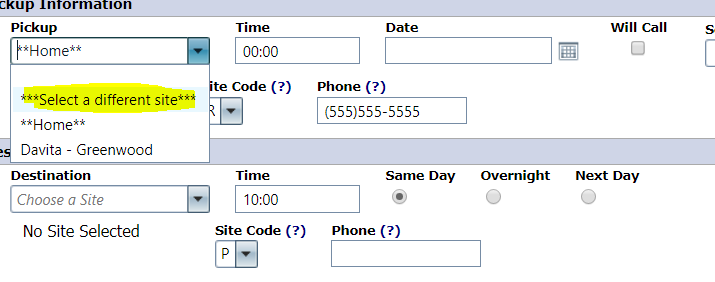
The Pickup Location will populate the Home address that has been entered for a rider. If you need them picked up at a different location you will need to **Select a different site*
After you have the correct pickup up site showing in the pickup box enter an estimated pickup time and the date the person needs the ride for.

Next, we need to choose or **select a different site** where the Rider needs to be dropped off using the destination dropdown.
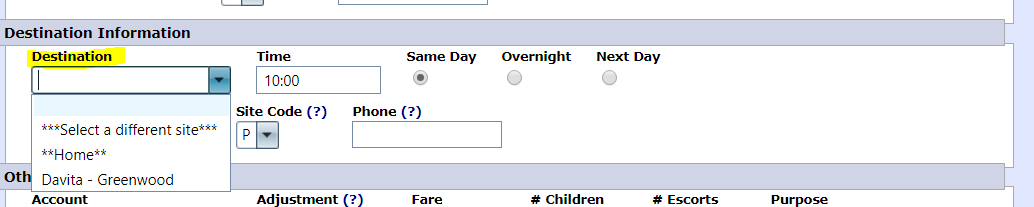
Once chosen the site information will populate

Now that we have that out of the way we need to indicate or ensure the Reservation is tied to the correct funding source/account.
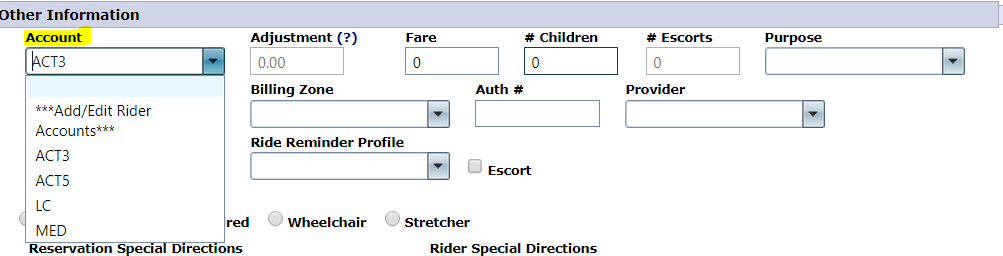
If the funding source is not listed in the drop down choose **Add/Edit Rider Accounts** to access this menu
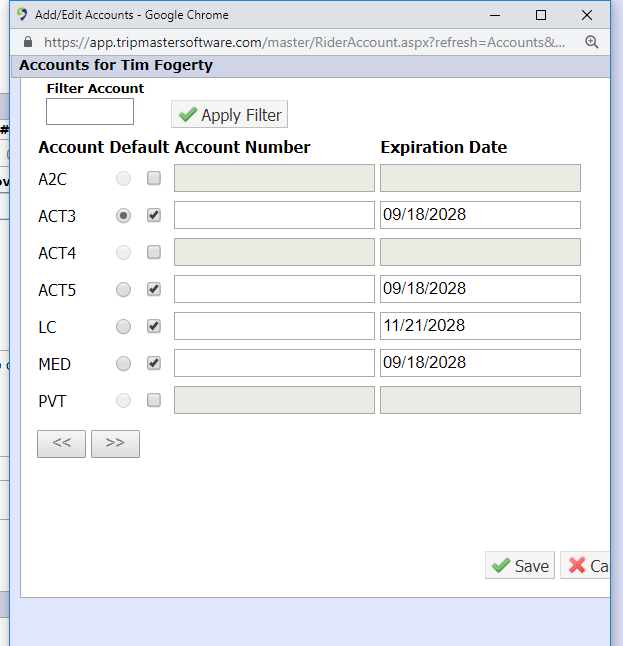
For an account to be available to choose in the Account dropdown it needs to have a check in the box next to it. If the account you need is not checked check it and it will be selectable from the dropdown after saving the Add/Edit account screen. Use the Account dropdown to select which one needs to be tied to this Reservation you are creating.
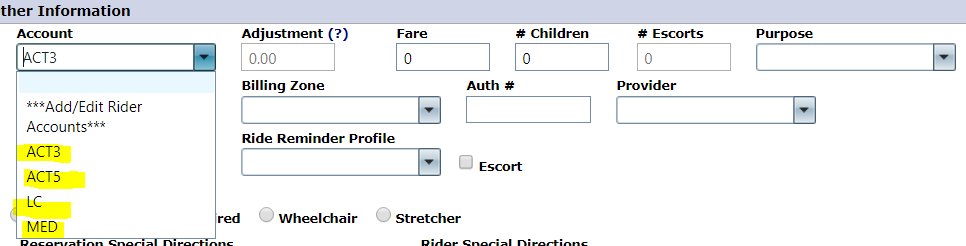
Fill in any other needed data capturing info such as purpose or if they will have a child with them or an escort. To populate an escort, check the box next to escort to populate an escort in the # Escorts box.
We are almost done creating a Demand Reservation Dropoff Priority A-Leg!
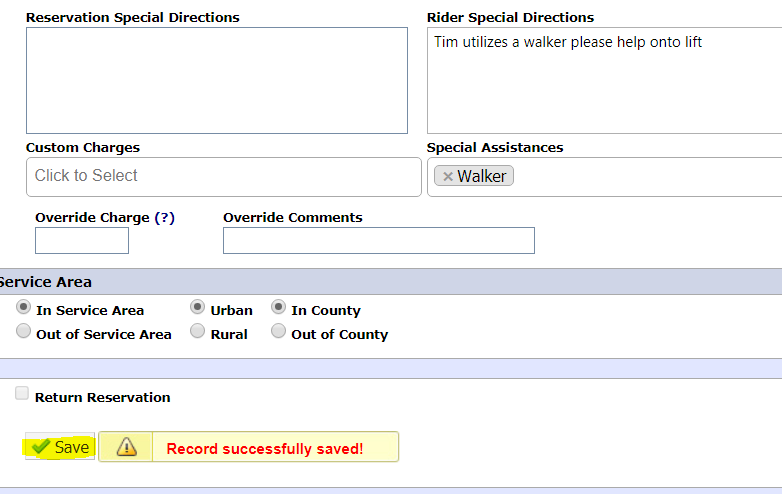
Type in any special directions pertaining to this one Reservation in order for the driver to be able to view that info.
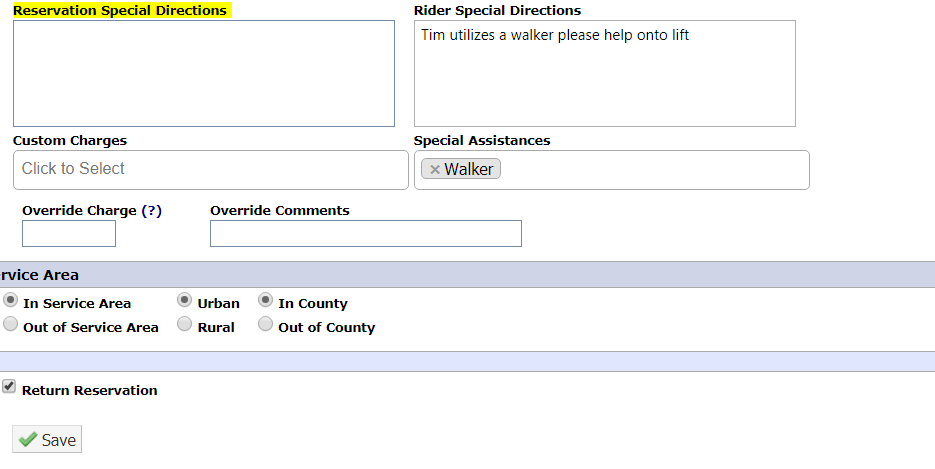
Lastly, to save this A-Leg Drop Off Priority Reservation hit save with the Return Reservation box checked. This will generate the B-Leg Pick-Up priority Reservation for you to further fill out for the return trip same way as above except its now a Pickup priority and the destinations will have flip flopped to indicate the proper pickup and drop off locations. Enter your estimated Priority pickup time and click in the white to populate it in the pickup time box and enter an estimated drop off time we hope to get them home by.
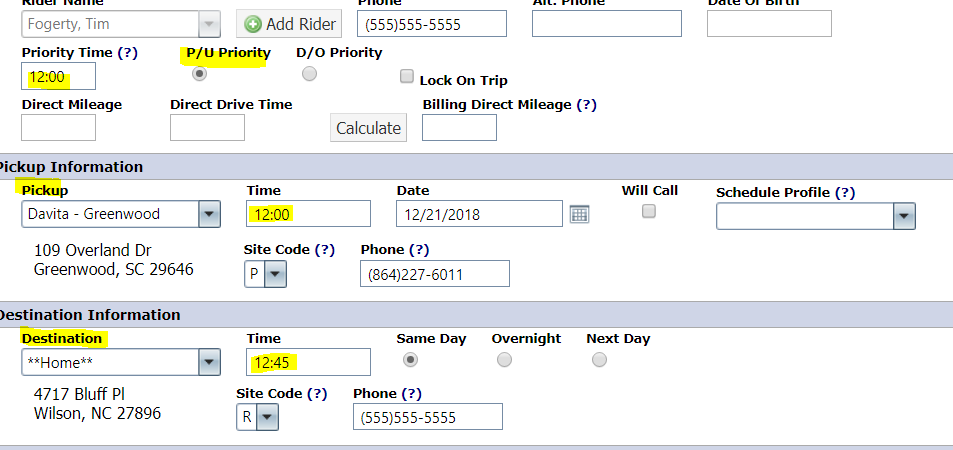
Scroll down and hit save. You have now created an A-Leg(Going to) and B-Leg(Returning from) reservation!