
Overview:
TripMaster’s new “Broker Tools” feature allows you to manage importing rides, adjusting rates, submitting billing, importing drivers and vehicles- all conveniently on one screen.
Section 1: Accessing the new Broker Tools Section
Follow these steps to access this new feature:
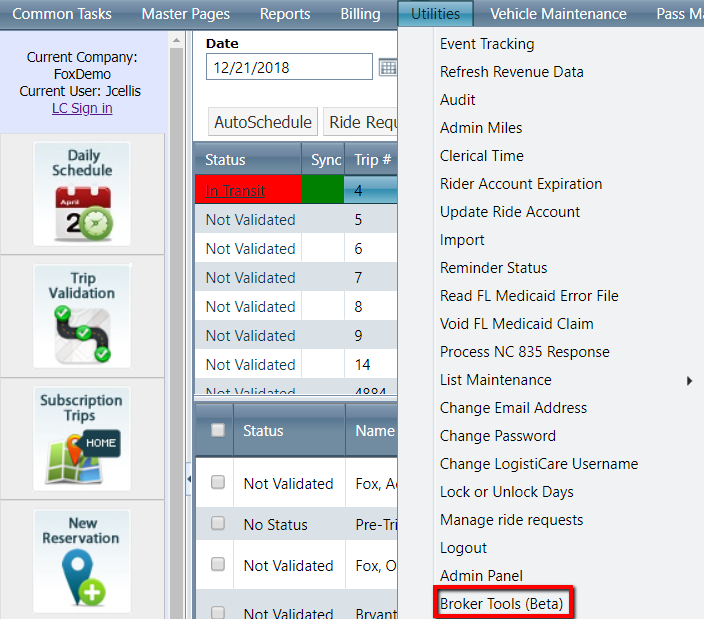
- Under the “Utilities” tab, select “Broker Tools (Beta)”:
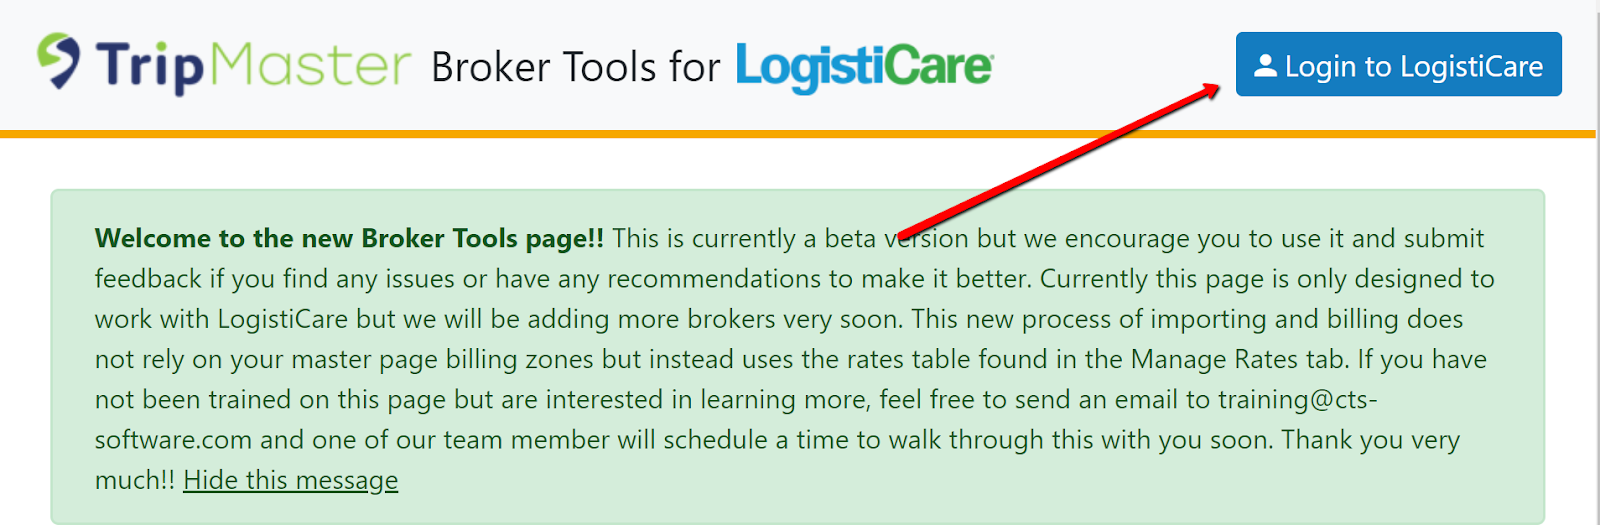
- In the top right select “Login to LogistiCare”:
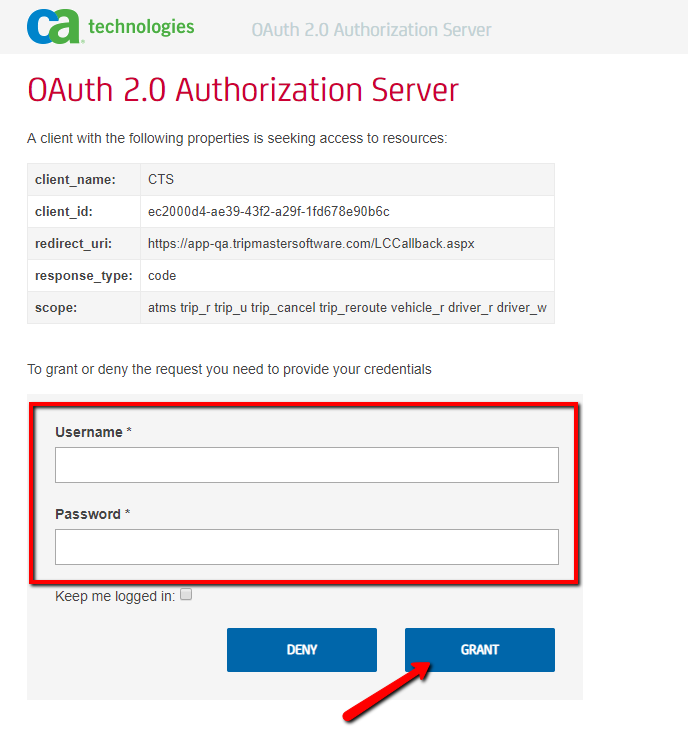
- Enter your LogistiCare credentials and click “Grant”:
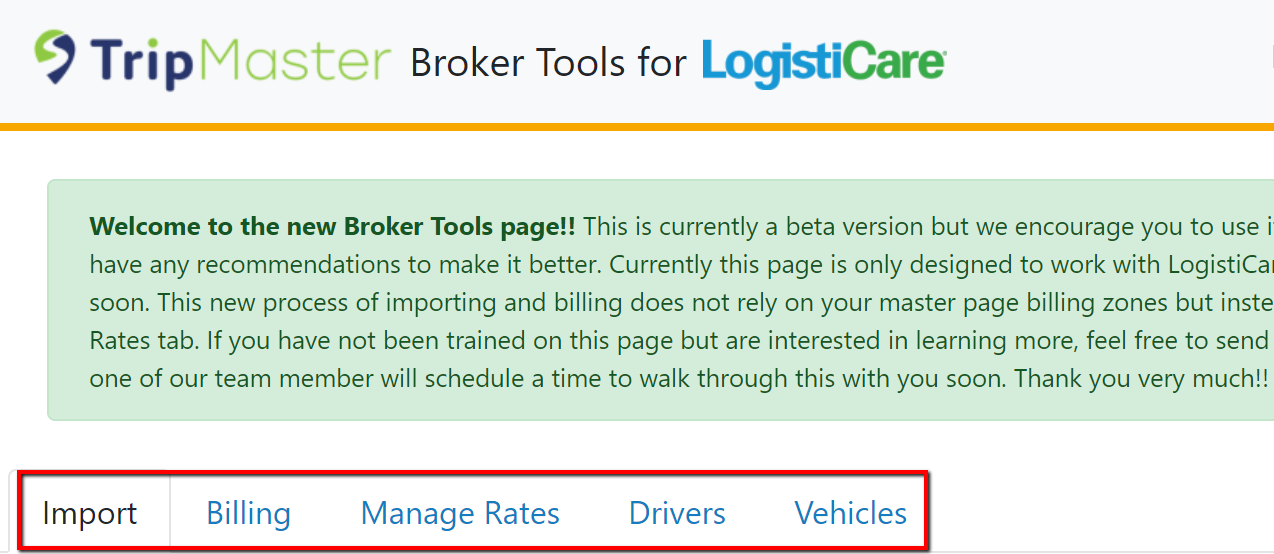
Once authorization is granted, the Broker Tools page will open. There are tabs for Importing, Billing, Managing Rates, Drivers, and Vehicles.
Section 2: The Import Tab
The import tab will allow trips to be transferred from the LogistiCare portal into TripMaster.
To Import:
1. Select the Import tab
2. Choose the trip date you wish to import
3. Click the Import button.
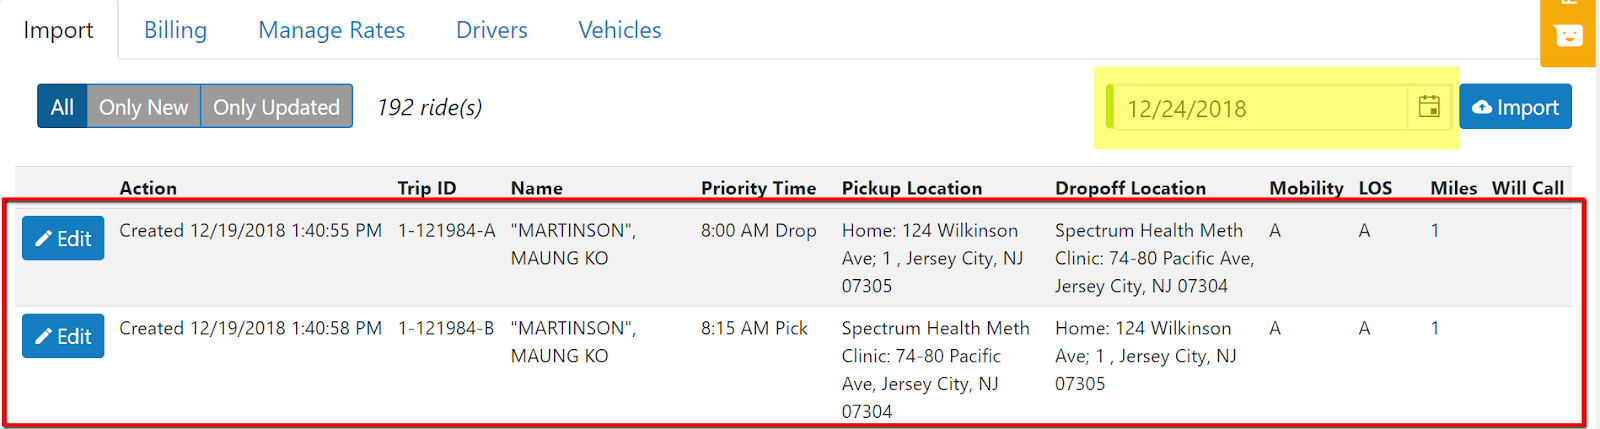
If any trips were available from LogistiCare for the date selected, they will now be displayed in the grid.
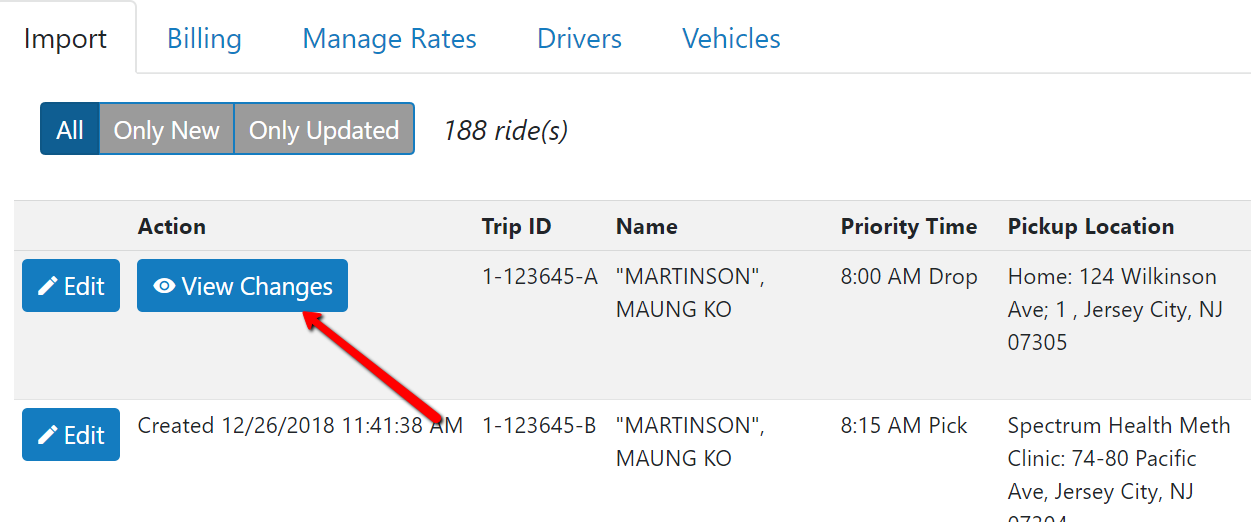
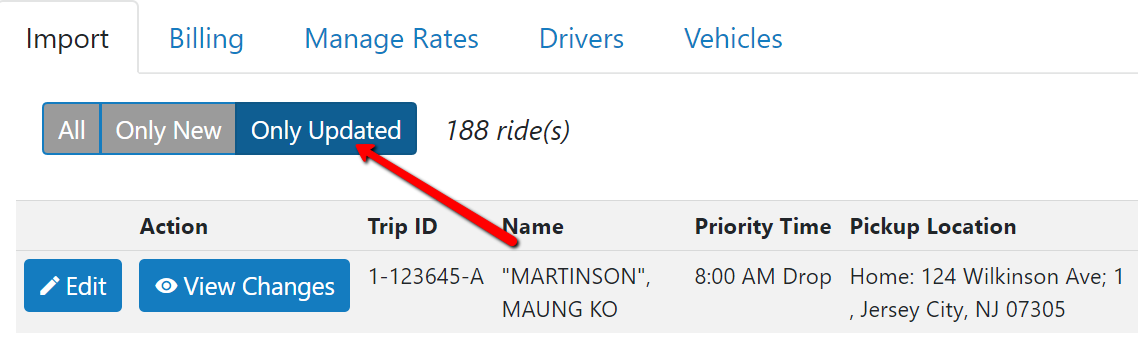
Importing throughout the day will reflect any changes that have been made in the LogistiCare portal, and a “View Changes” button will appear beside any trip that has been updated after re-importing.
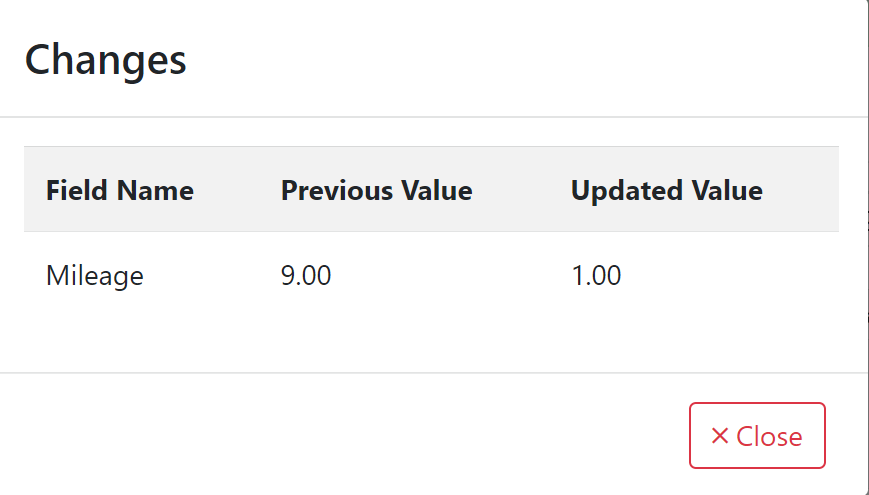
Clicking on view changes will give details on the change.
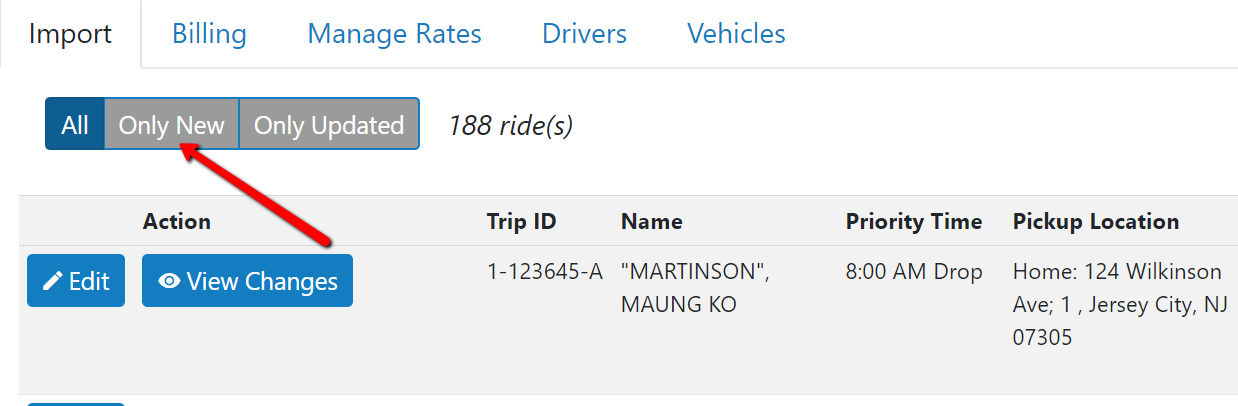
To view only new trips that have been imported click the “Only New” filter toggle.
To view only previously imported trips that have been updated click the “Only Updated” filter toggle.
Section 3: The Billing Tab
The billing tab is used to electronically submit billing to LogistiCare.
To review Billing:
1. Click the Billing tab
2. Set date ranges
3. Click Audit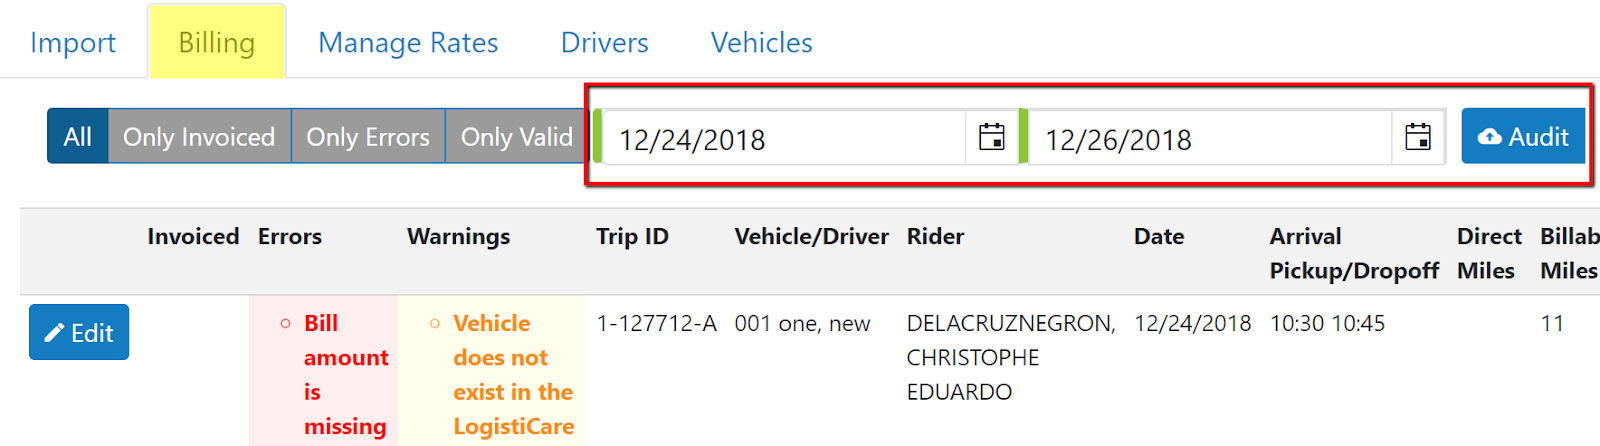
Any validated trips for that date range will appear displaying errors, warning, trip information, mileage, and billing amount.
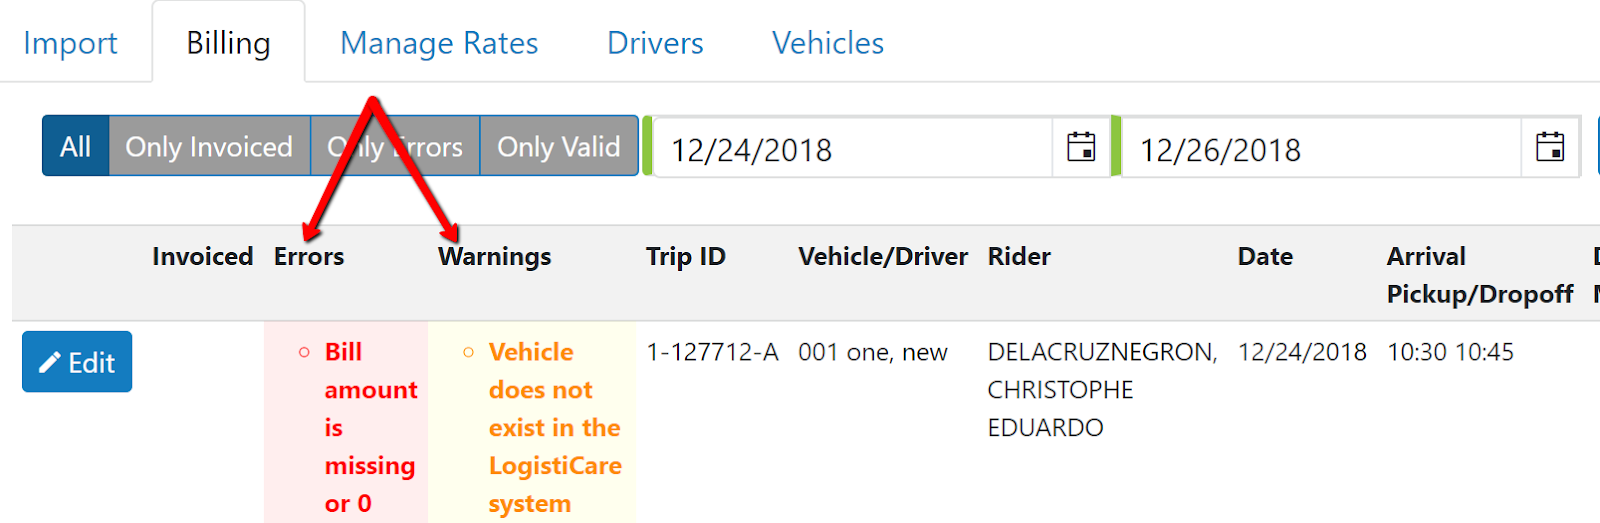
 Errors will not allow billing to be submitted. Warnings will allow submission but will have to be fixed in the LogistiCare portal before closing the batch.
Click Apply Rates and Refresh Revenue to update the charge.
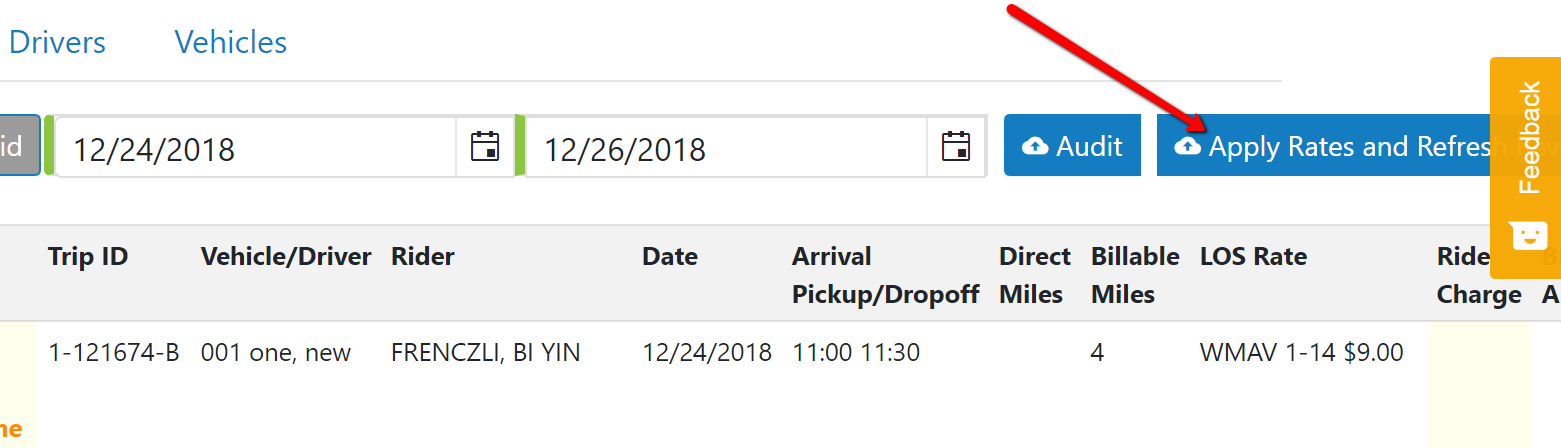
The Ride Charge and Bill Amount will update, the error will clear, and a Submit button will appear.
Click Submit to send billing to LogistiCare.

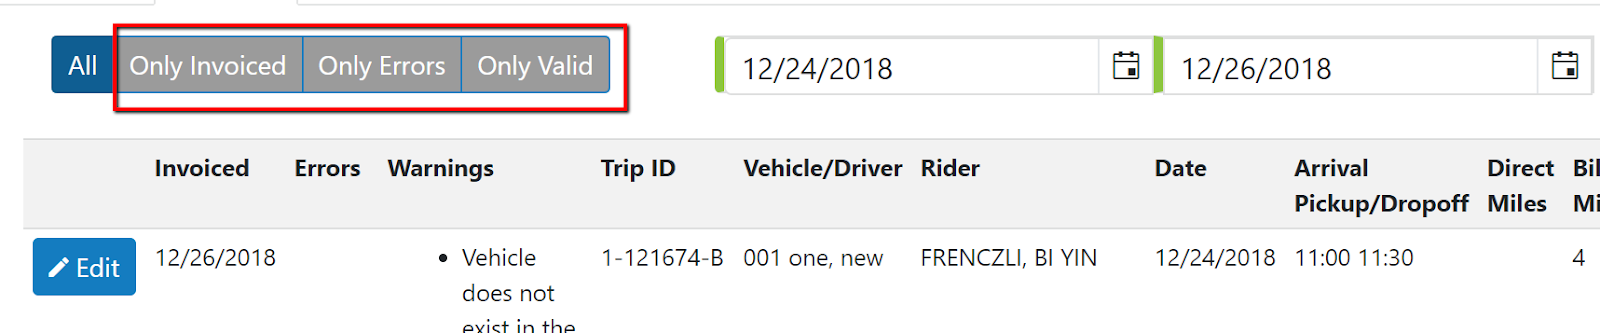
 You can use the “Only Invoiced”, “Only Errors”, and “Only Valid” filter toggles to filter for specific information.
Section 4: The Manage Rates Tab
The “Manage Rates” tab allows adjustment of rates and entering of new rates based on level of service. For new rates click “+ Add Rate”.
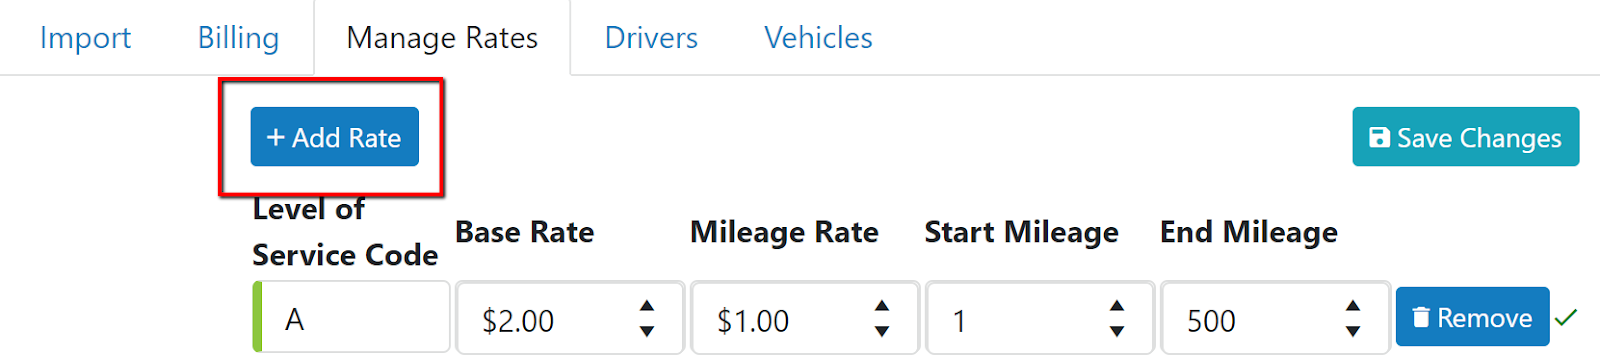
The Level of Service Code will default to the last rate entered, click in the level of service field to adjust as needed.
To Enter a Rate:
1. Enter Base Rate
2. Enter a Mileage Rate
3. Enter a Start Mileage
4. Enter End Mileage
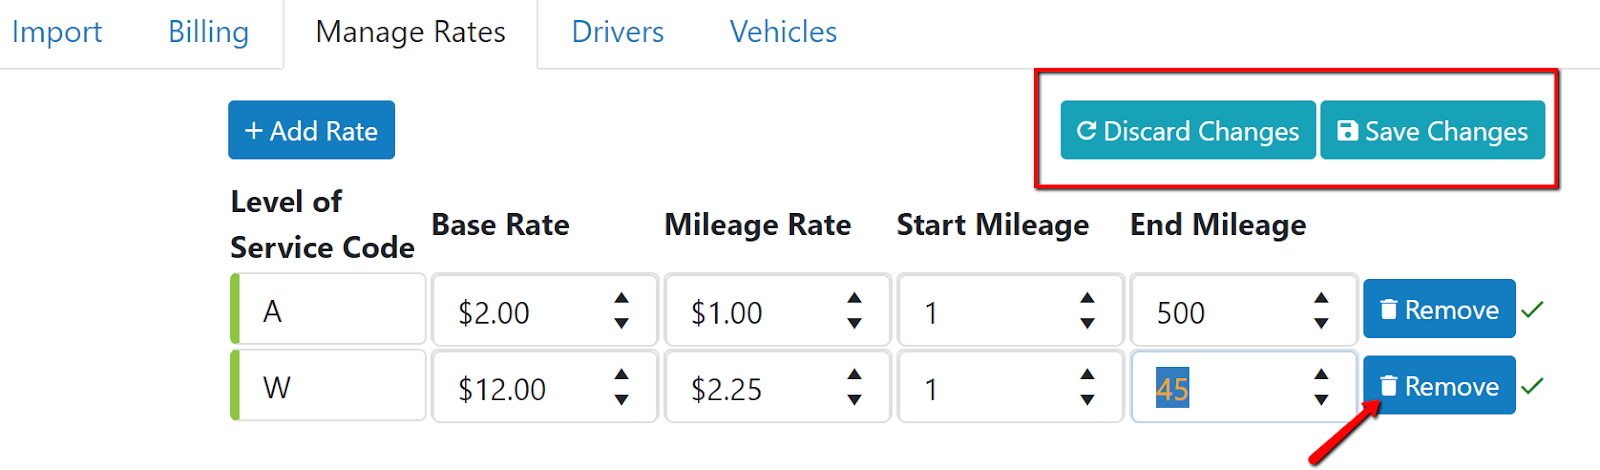
5. Click “Save Changes”
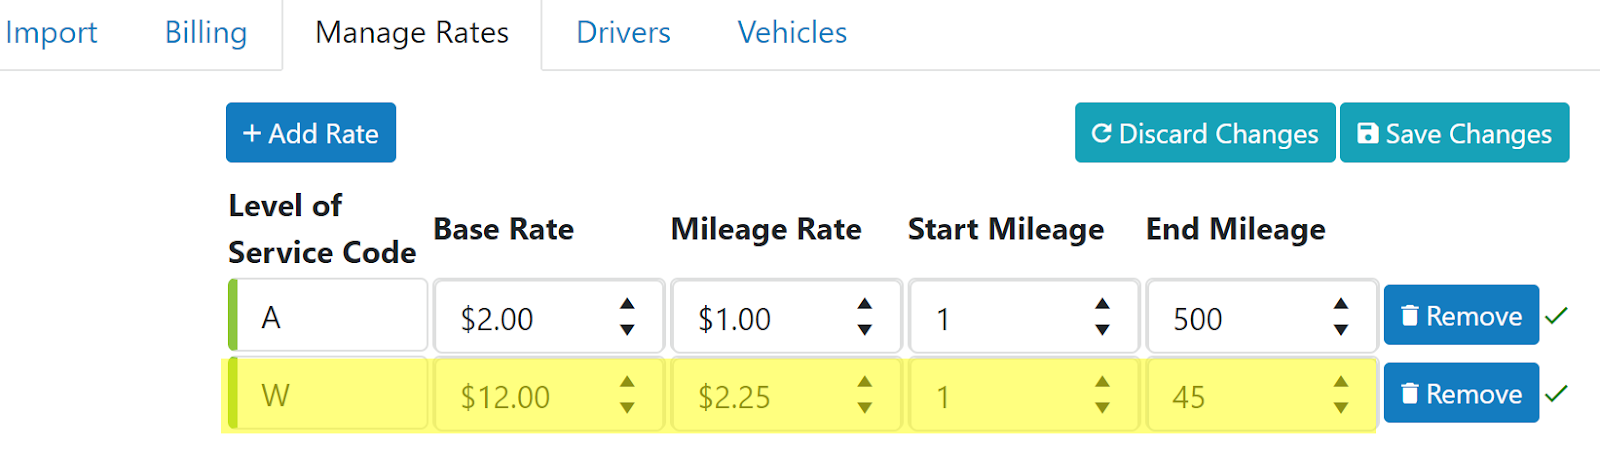
 A green check will appear next to the line indicating there is no overlapping mileage, or other errors with the rate that has been added.
You can remove charges at any time by selecting “Remove” next to the line of the rate that is no longer needed.
 Section 5: The Drivers Tab
This tab handles the importing of your drivers from LogistiCare.
To import Drivers:
1. Click the “Drivers” tab
2. Click “Import”
Any drivers in the LogistiCare portal will then be listed
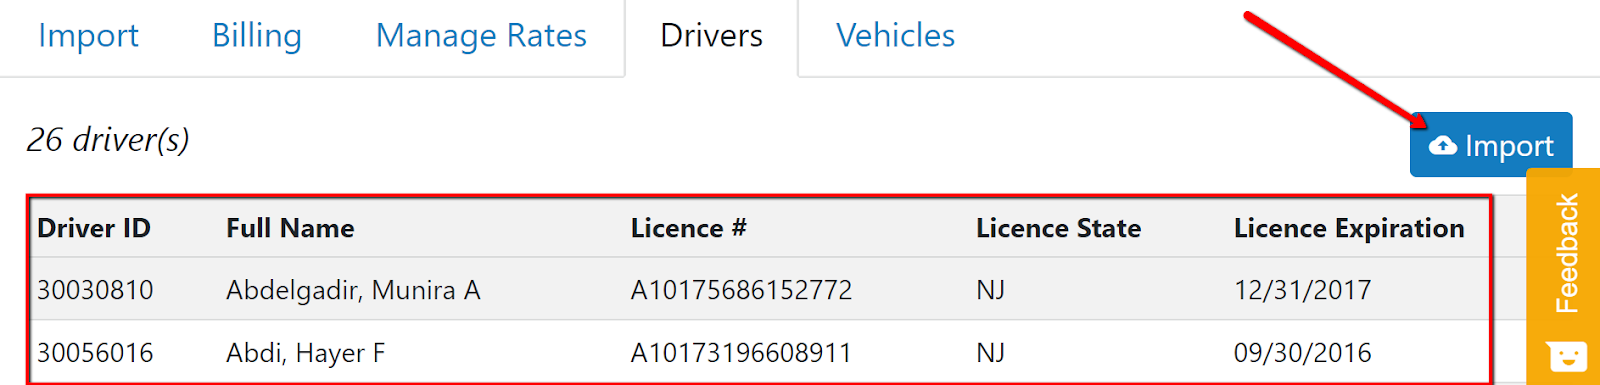
 Drivers imported from Driver Master will already be listed.
Section 6: The Vehicles Tab
This tab handles the importing of your vehicles from LogistiCare.
To import Vehicles:
1. Click the “Vehicles” tab
2. Click “Import”
Any vehicles in the LogistiCare portal will then be listed
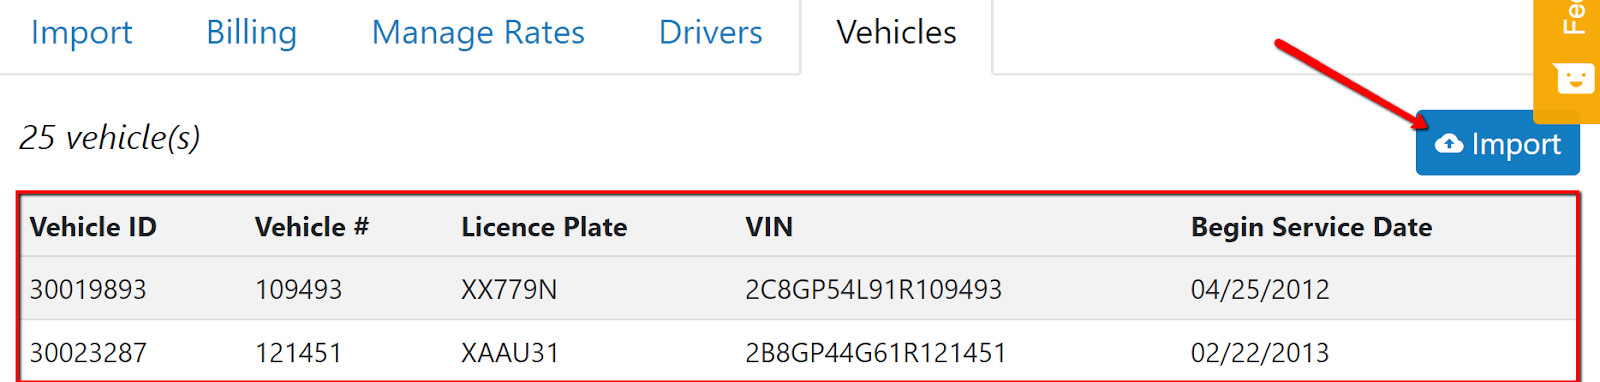
 Any vehicles imported from Vehicle Master will already be listed.